A bolt-on RXL conversion kit for 1983 to 1997 Polaris Indys
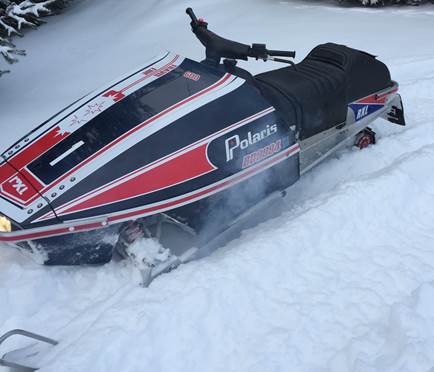
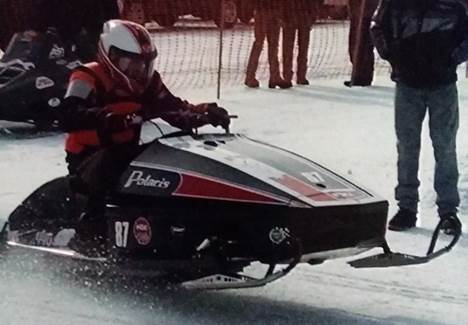
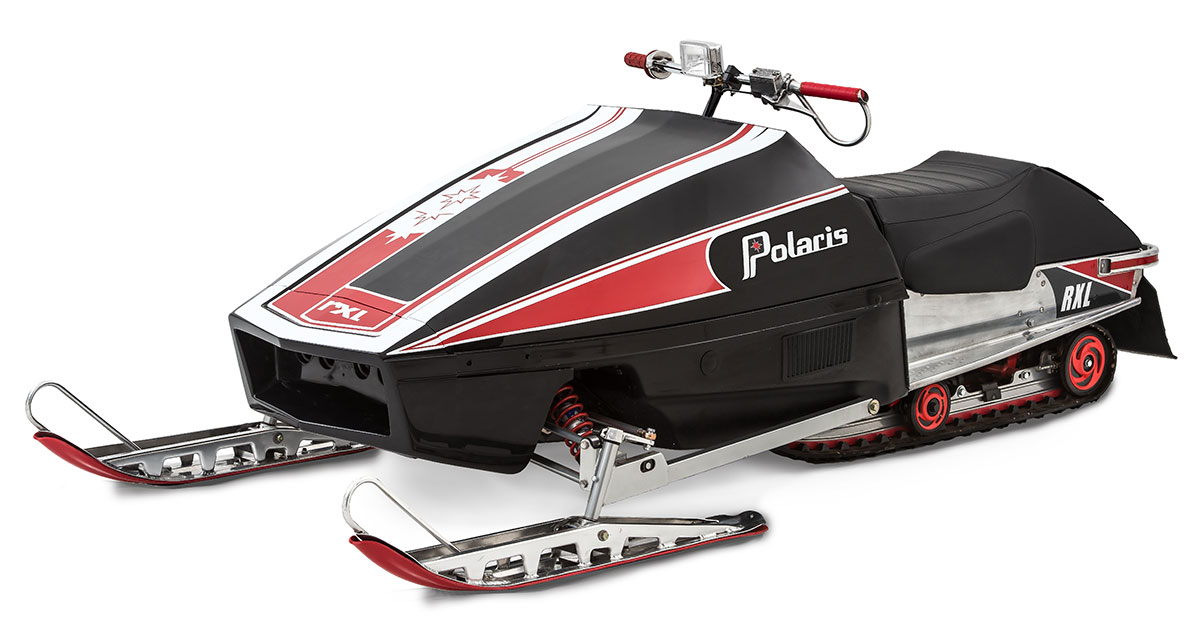 Polaris had 14 year string of success with its Indy Wedge from 1983 to 1997. The snowbelt is littered with thousands of used Indys priced from $200 to ones in primo shape. Since 1976, the year the RXL was introduced to the track, Polaris people have lusted after that hallmark sled for its design and performance.
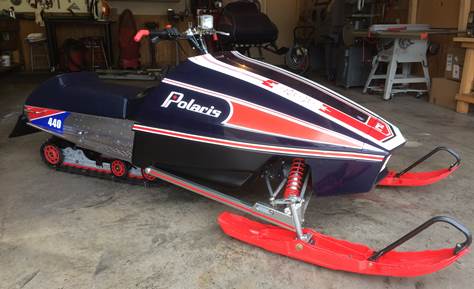
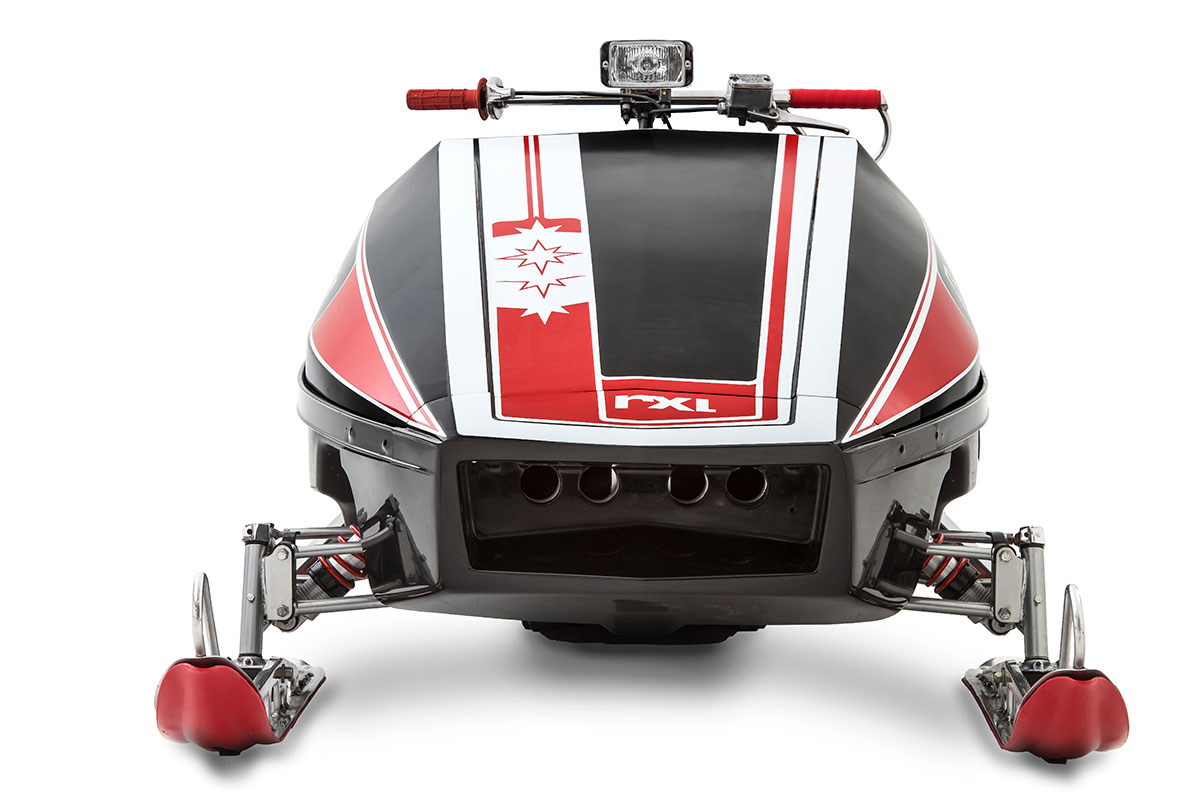 The RXL/Indy hood/nose is made from fiberglass and is available in white, black or midnight blue. The rear opening of the hood will fit pre-1988 small tanks or later big tanks. Graphics will be tuned to the owner's hood color choice and will fit tunnels with and without rear bumpers. The kit will fit any Wedge with an extruded aluminum bumper.
Other options complement an RXL build: hood mount kit, RXL graphics kit for hood and tunnel, headlight, oval bars, lightweight aluminum IFS skis and a right side oval stirrup is coming. RXL seats can be obtained from Conrad Van Batavia at 218-639-1815.
Pricing (as of 10/8/19)
| Hood and nose, in midnight blue or black | $675.00 |
| Hood and nose, in white (does not look good with my graphics) | $660.00 |
| Duez ¼ turn hood latch kit | $60.00 |
| Specify tank: Pre-1988 small tank or 1989-on big tank--I trim hood to match | |
| Options | |
|---|---|
| Hood/nose graphics | $249.00 |
| Tunnel graphics with bumper cutout | $49.00 |
| Tunnel graphics without bumper cutout | $49.00 |
| Graphics installation | $99.00 |
| RXL Halogen long-distance headlight - Mounts to roof in nose opening | $51.00 |
| Light bracket for steering column | $27.00 |
| Flat oval-style handlebars | $39.00 |
| Custom hand-built carton & plastic protection bag (see photo) | $45.00 |
| Accessories | |
| Grille in black or aluminum | $109.00 |
| Tail light bar | $49.00 |
| Aluminum IFS skis | $345.00 |
| Shipping (ordinarily Speedee or Greyhound) | |
| SpeeDee ND, SD, IL, WI, MN | $95.00 (approx.) |
| Greyhound | $120.00 (approx.) |
| Ship to Norway | $340.00 |
| Ship to Canada - I ship to Pembina ND. You drive across the border, pick up and pay a small fee to take back across. Formal shipping is wildly expensive with taxes. | |
If you wonder why I charge 45 bucks for the carton, this is why. Firstly, the raw box is very expensive because one, it’s big, and two, its thick dual-wall cardboard. Then I layout all the cuts and folds then assemble it. Each carton takes about an hour and a half. The wedge-shaped design does not permit top loading--you don’t want a tractor tire on top of your hood.
The design is so good that I’ve never had a damage claim. That’s a good thing because unbundling a damaged shipment claim can gobble up a lot of time neither of us needs to waste.
Assembly Manual

Free download - PDF, 350KB
Payment
Visa, Master, DiscoverCard. Minnesotans add 7.5% tax. Cards charged only on day of shipment. PayPal purchases will be subject to extra fee, particularly foreign sales. (They whack me hard!)
Returns
Acceptance is highly subject to condition. Restocking charge is 15%. Shipping charges not compensated.
Changes
Specs and prices may change without prior notification. Specs and prices will change without prior notification. Product designs by Phil Little Racing are copyrighted.
RXL Accessories
Graphics kit
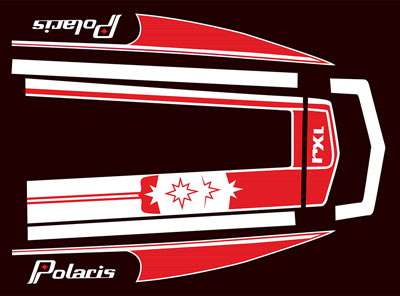 We can apply them for you (recommended--it's a bitch) or you can save the money and apply them yourself. It helps to have experience applying large-area graphics using the wet method. Tunnel graphics are not shown. I have two versions, one with cutout for rear bumper, the other for no bumper.
Halogen driving light
 This light is not some cheapo tossed in to keep the DNR happy. It is a 55 watt Halogen light that tosses a narrow beam about twice a normal car light. That is needed for sledding at night where you have to spot open ice, ice chunks and lazy deer well in advance. A replacement bulb is easily found at an auto parts store--ask for a Peterson 55w Halogen bulb.
The case is chrome and the mount is adjustable for height. I have selected a slightly different light now so it can be mounted in the RXL nose scoop or up on the handle bars so it points where you are going which is a tad safer. I am working on a bent plate that mounts under the handlebar perches. Two wires--negative and ground. See price list for light and bar mount. [Guys-take it easy at night, it's the most dangerous snowmobiling time.]
RXL Grille
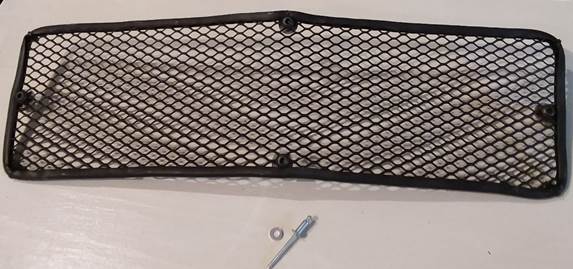 For years RXL owners have been asking me for a grille. I let it slide because I couldn’t figure out how to make or attach one. The mental processes finally won out and I now offer an RXL grille.
The original RXLs had them and it’s cool to mount the new grille in front of the headlight. The headlight won’t be hanging inside the hood mouth like a bad tooth. The material is aluminum so I can ship it in natural aluminum or paint it semi-flat black for you.
I am surrounding the mesh with a rubber trim edge, otherwise the jagged mesh edges would eat away the nose fiberglass or for sure cut your fingers in handling. There’s blood on my shop floor.
I found some nifty little aluminum angle mounts to hold the grille in place.
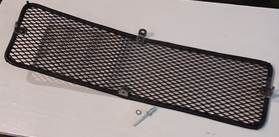
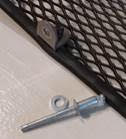

Price is $89.00 (and includes my ER visits).
RXL LED Taillight
![]() For those of you who are going to use a custom seat on your RXL or Retro, here is the perfect rear taillight. Whether you use a Conrad seat or make a custom back end for a big tank seat-the stock taillight can’t be used or shouldn’t be used because it screws up the sleek sloping rear. This light is 16 3/16” long, which is perfect because it goes completely across the seat.
For those of you who are going to use a custom seat on your RXL or Retro, here is the perfect rear taillight. Whether you use a Conrad seat or make a custom back end for a big tank seat-the stock taillight can’t be used or shouldn’t be used because it screws up the sleek sloping rear. This light is 16 3/16” long, which is perfect because it goes completely across the seat.
If you are using a Conrad seat, I’ll send this light to him so he can include a stripe of wood in your seat to mount this light. If you use the big tank seat base, you mount this light in the rear plastic edge of that seat base. Before you upholster the seat, drill the two mount holes (8 ½” on center) and the wiring hole (5/16”, if I remember correctly) in the seat base plastic. After upholstery, you just probe for the holes.

The light uses six-diode LEDs. It will operate from 9 to 16 volts. It has two wires and the ground wire is marked. The entire housing is one-piece and sealed with epoxy to eliminate moisture. It sits on a rubber mounting gasket. I searched high and low for a suitable light but they were all too short-then I found this perfect one and it was cheaper than the shorter SLP light.
Flat Race Bars
 These 7/8" bars are virtually flat and 29" wide. You'll appreciate the leverage in cornering.
How to make an RXL seat out of a big tank indy
Mark Elgar from Hubbell, Michigan bought an RXL hood but wanted to use the big tank. He and I talked it over and he was willing to lose the trunk and the stock taillight. That made getting the RXL shape possible. Mark decided, and I agreed, to not cover the tank. Looks more like a race version that way. He will add an SLP or other type of taillight/stop light mounted to the bumper.
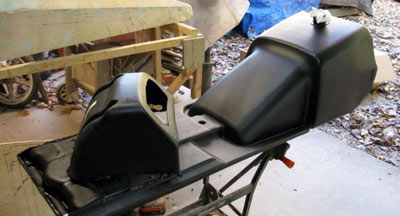 To start I cut off the trunk box/taillight mount.

 Then the foam was cut to accept a glued-on RXL back.
 I had foam only 3” thick so I had to glue the pieces together. Hint: dense foam is easier to grind and sand with a bread knife, hand belt sander and rotary disc in drill. Use super upholstery spray glue.
 Glue all the pieces, then sand for uniformity and smoothness. That’s an ice boat body in the background.
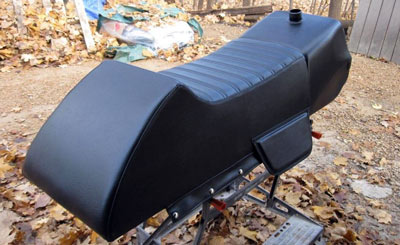 Next step is the upholsterer. The foam took me a day and a half so don’t be a-comin’ to me to do this for you because I’d have to charge a bunch of money. Since the above photos were taken I flattened the back curve to more like the RXL shape.
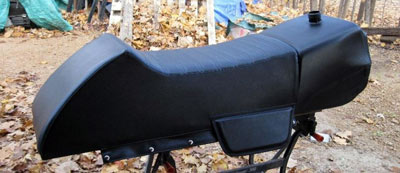 Okay now you can see the longer slope on the tail back. Mark wanted an old time snap look for this seat. The cover is stapled to the base but the snap strip was just added as a visual. The snaps will work like the original seats. We added a race-style knee pad for the look but made it thin so it didn’t get in the way of his right boot.
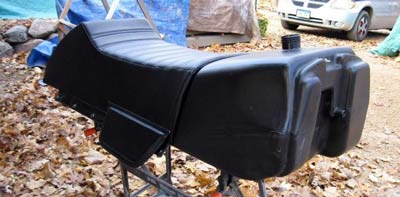 I think the seat project ended perfectly and it was smart not to cover the tank.
The cost worked out to be $500... right where Conrad is with his small tank seats. There ya go--just one man’s way to get the race look with stock components.
Indy Fan-cooled Sleds Overheating
A special concern with RXL hoods
Most Trail Indys with stock hoods do not over heat because stock hoods have lots of fresh air scoops. Some owners do experience bogging in warm weather from overheating not caused by air box blockage (mice), improper jetting, bad plugs, plugged gas cap vents or other mechanical issues. If you have this experience, my solution can help you too.
The cause of overheating with fan engines
The factory ran the exhaust pipe right next to the engine intake fan. The air flowing over the engine was warmed. The temperature in the engine compartment further increases if it is not expelled from the fan exhaust port. The probability of overheating with a fan engine under my RXL hood is increased because fresh air intake is reduced by the non-vented RXL hood. The single source of fresh air are the four 2” holes in the bulkhead.
There are two solutions
One. Deflect the exhaust heat so it is not sucked into the engine Two. Drill holes in the back of the air box so cooler air is sucked in from the left engine compartment side. This trick can be used for liquid cooled engines as well if bogging occurs.
A eureka moment
I have no idea why I didn’t come to this solution two years ago. For over ten years, I have been doing advertising (my other business) for Swain Tech. They are the only company on the planet who coats exhaust systems with ceramic. Ceramic (a stone-like material) contains heat inside the pipe. You can grab the pipe with bare hands when the engine running full blast.
Let me tell you about this stuff. It’s called White Lightning TM . It’s a .015” (about 1/16”) thick ceramic coating that fuses with the pipe steel at extremely high temperature. This cures the engine compartment heat problem so even a fan engine can be properly cooled. Heat radiation is reduces by up to 50%. Under car hoods from 800 o F to below 400º F.
However, there’s more.
This thick insulating layer contains heat inside the pipe but also increases gas velocity and improves scavenging. This combustion effect increases horsepower by about 3%. Against a similar stock sled, you’ll pass them every time because ceramic is “bolt-on” horsepower.
I can hear you thinking “Why not just wrap the pipe with bands of fiberglass heat wrap or Kevlar?” you say. Well I’m here to tell you, that will work until your exhaust system crumbles into rust pile. The problem is snow (water) gets between the wraps and rust immediately attacks the pipe-not a slick idea!
Do what I am going to do with both my RXLs
White Lightning is white and gets ugly with use. The uglier it get the better it works This summer I’m going to have my pipes and headers sand blasted, then send to
Swain for White Lightning coating. The cost is cheaper than anything I could develop.
- Single pipes are $90-135
- Twins are $150-175
- Triples are $225-275
- Y-headers, about $35
Prices may vary a bit.
Swain Tech Coatings, Inc.
963 North Road
Scottsville, NY 14546
585-889-2786
office@swaintech.com
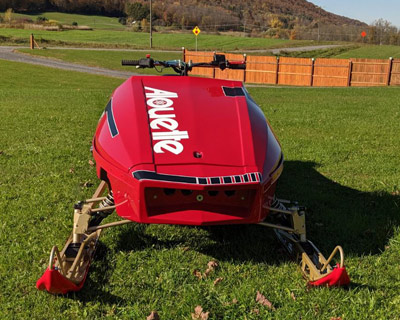
RXL or Allouette?
Story credit to Olav Aaen.
Gilles Villeneuve was a unique pro snowmobile racer in the 70s. Racing for Allouette meant racing on a budget. The Villeneuve team arrived at the races in an old school bus (unlike the big race teams with trucks, mechanics, spare parts and other benefits big factories supplied).
Allouettes were powered by Sachs but were down on power to Yamaha, Polaris, Arctic, and Ski-Doo. Gilles won many significant races because the spirit in his 130-lb. 5-foot-4 frame was on fire. He mastered speed at the absolute limit, no matter the track conditions or what machine he rode. He always strove to be the fastest and could muscle his Allouette right at the traction limit. He was driven and took chances other racers didn’t. His early Allouettes were leafers but he graduated later to IFS.
That’s where John Curtis from Homer, NY enters the picture. Three years ago John built a nice RXL/Indy, but last year decided to build another SnoPro look-alike. He studied old race photos and noticed a similarity between the RXL and Allouette racers. He surmised with the right colors and graphics the connection could be even closer. He was right and built himself a most special “RXL.” I’d love to be near snowmobilers in a restaurant as John passes by the windows, “Did you see that? An Allouette Snopro Racer!”
John recently earned a First Place with his RXL hood disguised as an Allouette. Good on ya, John.


